
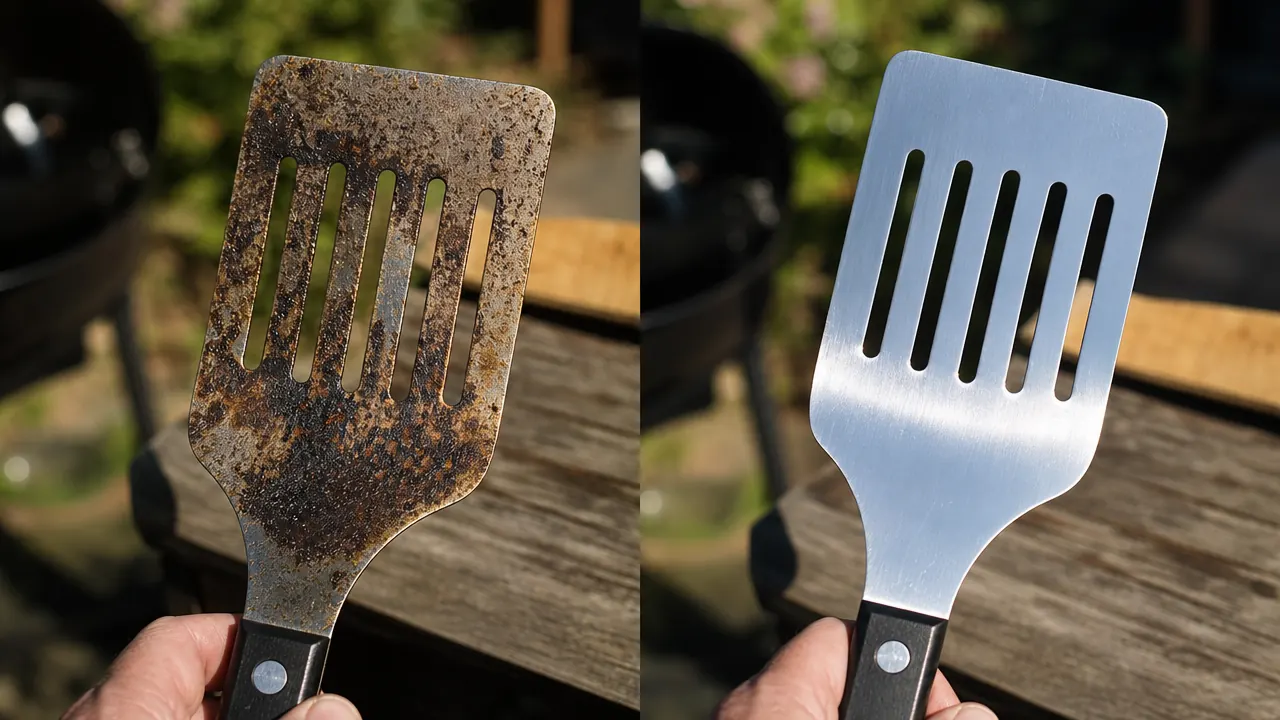
I learned the hard way that stainless steel does not clean itself. A few years back I had a solid set of grill tools that I was rinsing under cold water after each cook and calling it done. By the end of the summer the tongs had a brown film baked into the hinge, the spatula had rust forming at the rivets, and the grill brush was just embarrassing. I threw the whole set out and started over. Now I do it right every single time, and my current set, the ROMANTICIST 23-piece BBQ grill accessories, has gone through two full grilling seasons without a single rust spot. Every tool still looks close to new.
The problem is not stainless steel itself. Grade 304 stainless, which is what quality tool sets use, is genuinely corrosion-resistant when maintained correctly. The problem is grease that gets left on the metal, moisture trapped in hinges and seams, and abrasive cleaners that scratch the surface and give rust a foothold. Fix those three things and your tools will outlast any cheap set you could replace them with. This guide walks through exactly how to do that, step by step, in the order that matters.
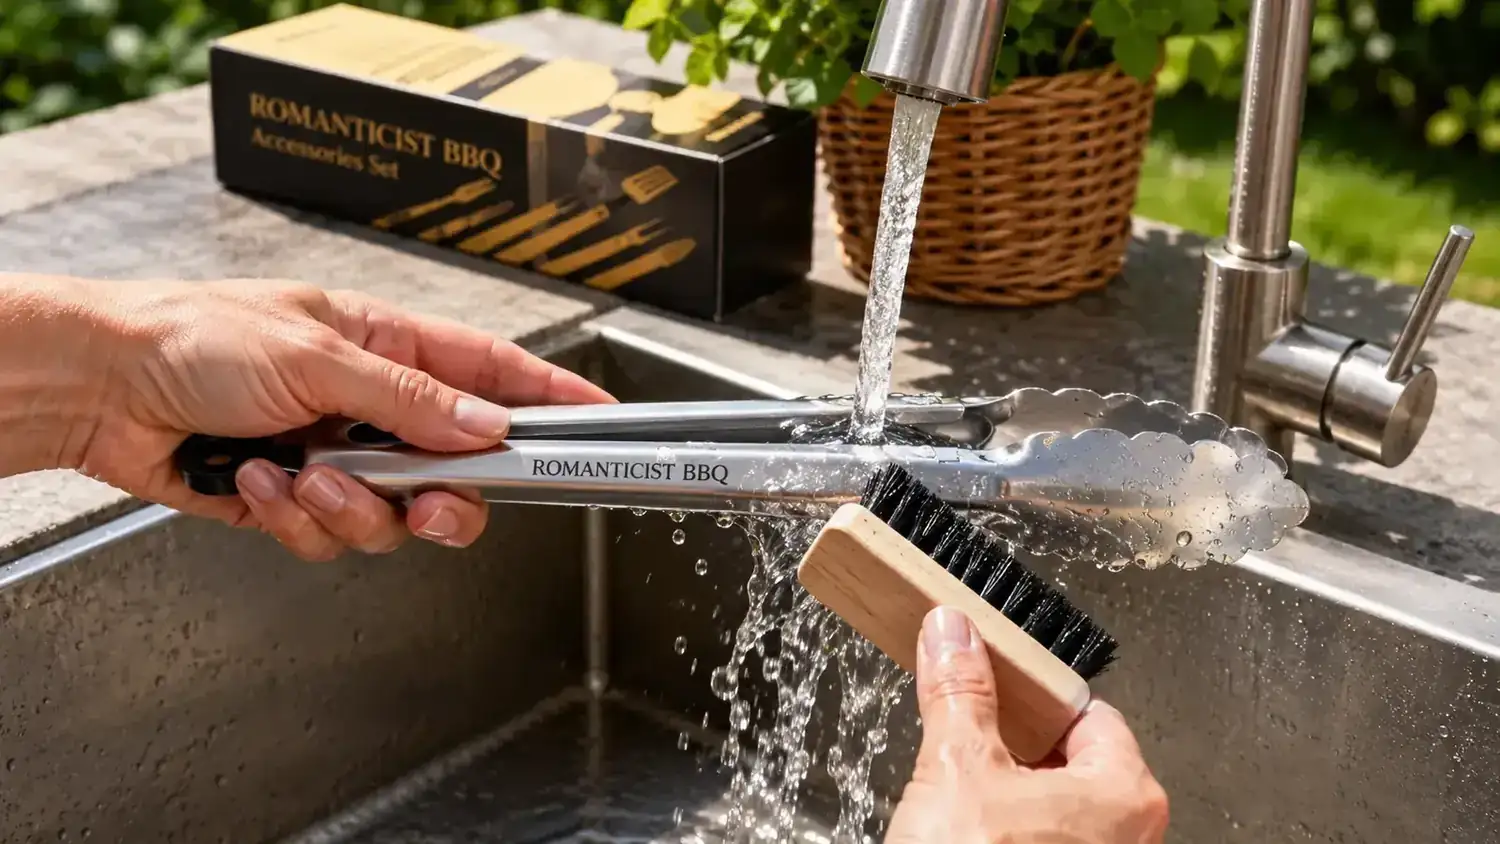
Using tools that fight you at every step? The ROMANTICIST 23-piece set is what I clean with this exact method.
Heavy-duty stainless steel, comfortable handles, and a carrying case that keeps everything organized between cooks. Over 10,000 reviews with a 4.7-star rating.
Amazon Check Today's Price on Amazon →Step 1: Let the Tools Cool Before You Touch Them
This sounds obvious but people rush it and cause themselves problems. Plunging hot metal straight into water, especially cold water, can cause rapid thermal contraction that stresses any solder points or rivets on your tools. If you have a spatula with a riveted handle, that joint is the first place rust shows up. Let your tools sit off the heat for at least ten minutes before you start cleaning. I usually set mine on the side table while I plate up the food and by the time I bring the serving dishes inside, they are cool enough to handle safely. A small detail, but it pays off over two or three seasons.
The only exception is the grill brush. Use it while the grates are still hot so carbonized residue comes off easily. Scrub the grates before you remove the cooking tools, then let the brush cool alongside everything else and clean it as part of the same routine.
Step 2: Scrape Off Loose Char and Grease Immediately
Before any water touches your tools, take a paper towel and wipe away the loose char and grease while the metal is still warm but not hot. Grease that is still pliable wipes off in seconds. Grease that has cooled completely and hardened requires more scrubbing and more aggressive cleaners. This one step cuts your cleaning time in half. I keep a roll of heavy-duty paper towels on the prep table outside specifically for this purpose. Wipe down the blade of the spatula, the inside faces of the tongs, and the handle areas where grease tends to drip and accumulate during a cook.
Do not skip this step even if you plan to soak the tools afterward. Removing loose material before soaking means the soak water actually penetrates stuck-on deposits instead of just sitting on top of a greasy film that repels it.
Step 3: Soak in Hot Soapy Water for 10 to 15 Minutes
Fill your kitchen sink with the hottest water your tap produces and add a few drops of standard dish soap. Submerge all the metal tools completely and let them soak for 10 to 15 minutes. Do not use bleach-based cleaners, steel wool, or powdered abrasive cleansers at this stage. All three will scratch the surface of your stainless steel, and those micro-scratches become rust traps over time. Plain dish soap and hot water loosen carbonized grease without damaging the metal's passivation layer, which is the invisible oxide coating that gives stainless steel its corrosion resistance. Once that layer is scratched away it does not regenerate on its own.
If you have tools with wooden or plastic handles, do not submerge the handle section. Keep the metal working end in the water and rest the handle on the edge of the sink. For sets like the ROMANTICIST that use all-metal or rubberized handles, full submersion is fine. The canvas carrying case that comes with the set is not waterproof though, so keep that well away from the sink.
Dish soap and hot water loosen carbonized grease without damaging the passivation layer that gives stainless steel its corrosion resistance. Skip the abrasives entirely.
Step 4: Scrub with a Non-Scratch Sponge or Nylon Brush
After the soak, use the non-scratch side of a standard sponge or a nylon-bristle brush for tighter areas. Work the blade of the spatula from base to tip in long strokes. For tongs, open and close them under the water while scrubbing to get into the hinge mechanism where grease collects and hardens. The hinge is the single most neglected part of any tong design. Grease that dries there creates a sticky surface that picks up debris and eventually causes the joint to stiffen and drag. A 30-second focused pass on the hinge every cook prevents that completely.
A small nylon bottle brush or an old toothbrush is ideal for the riveted joints on spatulas and for the serrated edges on tong teeth. Do not use a wire brush on the tool surfaces. Save the wire brush for the grates only. On the ROMANTICIST set the tong tips have a scalloped serrated edge that does a great job gripping meat, and that same serration also traps residue between cooks. A quick pass with a stiff nylon brush clears it completely and keeps the grip aggressive where you need it.
Step 5: Rinse Thoroughly and Dry Immediately
Rinse every tool under hot running water until all soap residue is gone. Soap left on metal is not a significant rust risk on its own, but it can affect the taste of the next cook if it gets onto the grates during a sear. Far more important is the drying step, which most grillers rush or skip entirely. Water sitting in joints, seams, and around rivets is the primary cause of rust spots on otherwise quality stainless tools. Dry every surface with a clean lint-free towel immediately after rinsing. Do not let them air dry on a rack and call it done.
For the hinge on tongs, open them fully, dry the inner faces of both arms, then close them and dry the exterior again. Stand the tools upright in a dish rack for five minutes to let any remaining trapped moisture drain and evaporate from the joints, then do a final wipe before you put them away. This routine takes under two minutes for a full set once you have done it a few times.
If you have a gas range, you can briefly hold each tool over a low burner for a few seconds to flash-evaporate moisture from hard-to-reach joints. Do not do this with any tool that has rubber or plastic inserts on the handle, and keep the motion slow and steady so you are heating evenly rather than scorching one spot.
What Else Helps: Seasonal Oiling, Proper Storage, and Fixing Early Rust
Once or twice per grilling season, rub your stainless steel tools down with a small amount of food-grade mineral oil or refined coconut oil after drying. This creates a thin protective barrier that slows oxidation at joint and rivet points where the steel is most exposed. You do not need much at all. A few drops on a paper towel is enough to coat the entire working surface of a spatula and a pair of tongs. Wipe off any visible excess before storing so you are not leaving pooled oil on the metal. Think of it the same way you think about seasoning cast iron, just on a lighter scale and without the high-heat step.
Storage matters more than most grillers acknowledge. Tools stored loose in a drawer where they can knock against other metal objects develop surface scratches. Tools stored outside or in a humid garage without protection accumulate moisture between sessions. The ROMANTICIST set ships with a zippered canvas carrying case that holds all 23 pieces in individual loops, which keeps everything separated and shields the metal from ambient humidity. I keep mine on a shelf in the garage, tools returned to their slots after every cook and the case fully zipped. Compared to a previous set I stored in a kitchen utensil drawer, the condition after one full season was dramatically better. See the full write-up in the ROMANTICIST BBQ set long-term review for more detail on how the case holds up.
For any surface rust spots that appear despite proper care, make a paste with baking soda and water and apply it to the affected area with a soft cloth. Let it sit for 15 minutes, then scrub gently with a nylon brush and rinse completely. For anything worse than light surface rust, Bar Keepers Friend powder works well on stainless steel because it uses mild oxalic acid to dissolve rust without requiring aggressive scrubbing. Follow the label directions and rinse thoroughly. Do not let it sit on the metal longer than the label recommends.
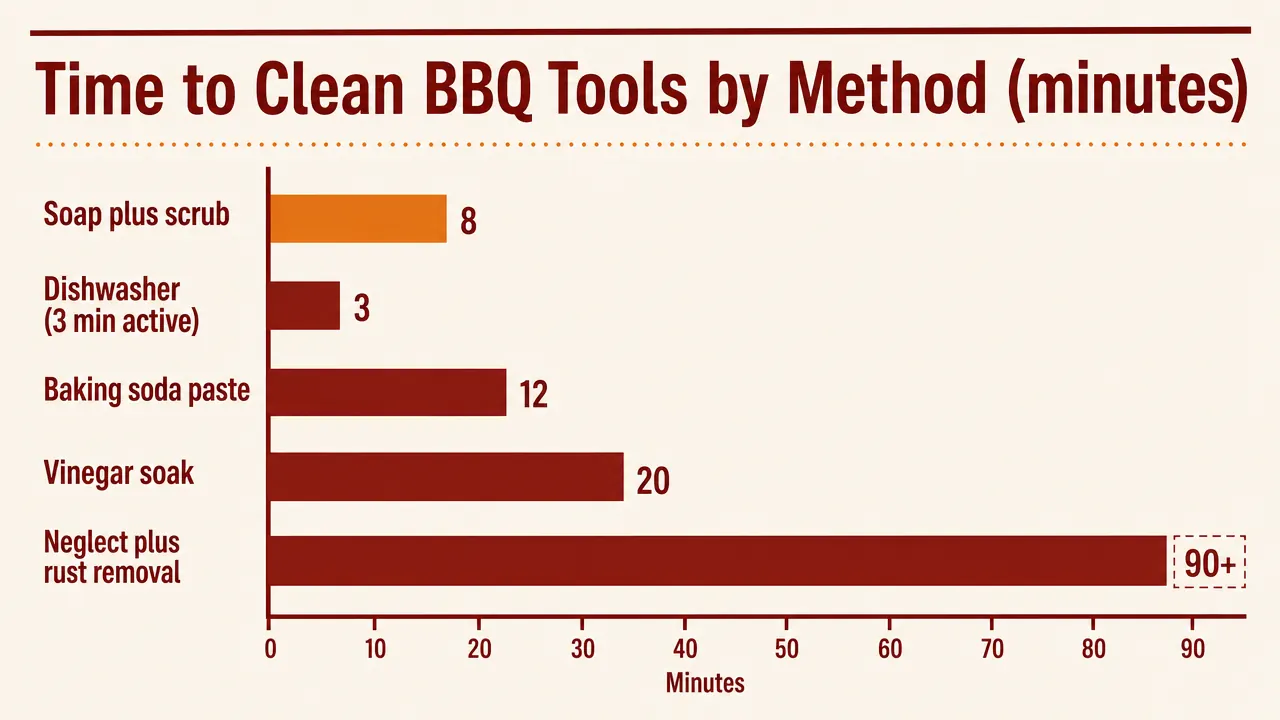
The one cleaning method that never helps here is the dishwasher. High heat cycles, harsh detergent formulations, and extended moisture exposure inside the machine are all rough on the joint areas of stainless tools. The metal itself is technically dishwasher-safe, but the combination accelerates wear on rivets and handle attachments faster than hand washing ever would. Hand washing takes three minutes per cook session. It is genuinely worth it.
If you grill with heat-resistant gloves and want a pair that gives you enough dexterity to grip and flip while fully protecting your hands, the RAPICCA BBQ gloves review covers what to look for and how the 932F-rated pair holds up through a full season of heavy use.
If you are going to clean your tools this carefully, make sure the tools are actually worth maintaining.
The ROMANTICIST 23-piece set is the one I run through this routine after every cook. Heavy-gauge stainless, a carrying case that fits the whole set, and a meat thermometer included in the kit. Rated 4.7 stars across 10,685 reviews.
Amazon Check Today's Price on Amazon →